Configure DNS for AWS Route53 Email Forwarding
When we send an email to a domain, mail server reads MX records of domain and connect to that server. When we receive an email from a domain, mail server reads SPF records of the domain to see if the sender is authorized to send email on your domain.
Therefore, our process is
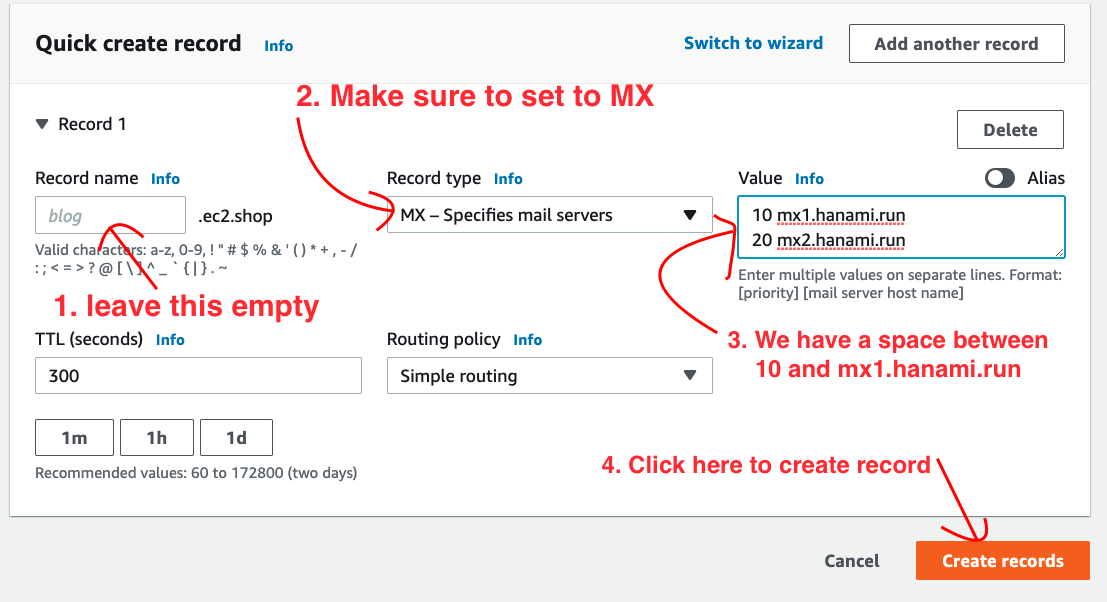
Configure MX records
You will need to set MX records of your domain to:
- mx1.hanami.run
- mx2.hanami.run
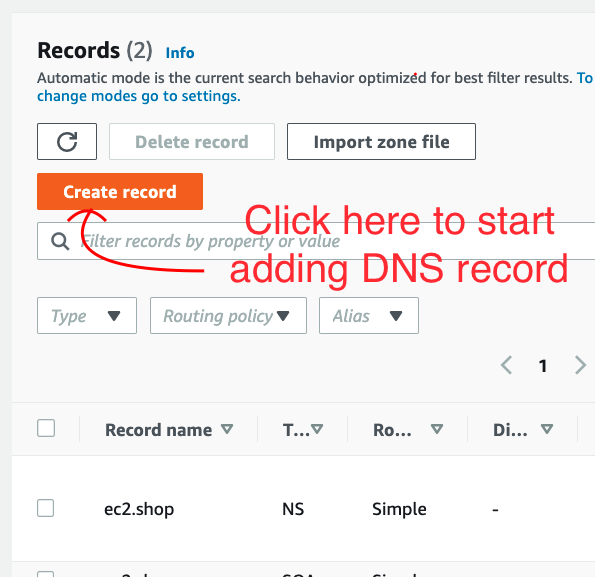
Example, here we have a domain called ec2.shop and this is how the DNS configuration looks like on aws route53.

Click on "Create record". In next screen, fill in information as following picture

Configure SPF record
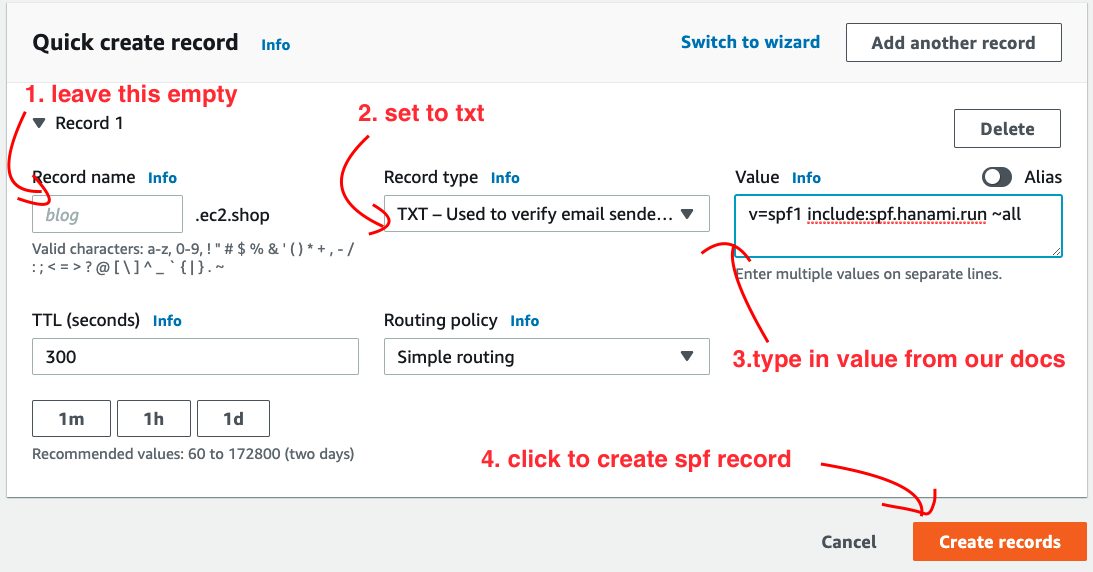
SPF record is a TXT record with spf prefix. You will need to add a TXT record with below value:
v=spf1 include:spf.hanami.run ~all
If you already had an existing SPF record, such as you already configure it to with Amazon SES or SendGrid, you just need to insert this right after `v=spf1` like this:
v=spf1 include:spf.hanami.run your-existing-spf-record-go-here
As long as this string include:spf.hanami.run appears inside the TXT record of `v=spf1...`, we're good. Our system also helps by detecting your existings SPF record and suggest the right change.
From your Route53 Domain page, click on "Create record" as before, then in next screen, fill in this information

Configure subdomain
Sometimes when your top domain is already used with a mail service like gmail.com or fastmail.com but you would like to have some kind of email forwarding, you can use a subdomain for that purpose.
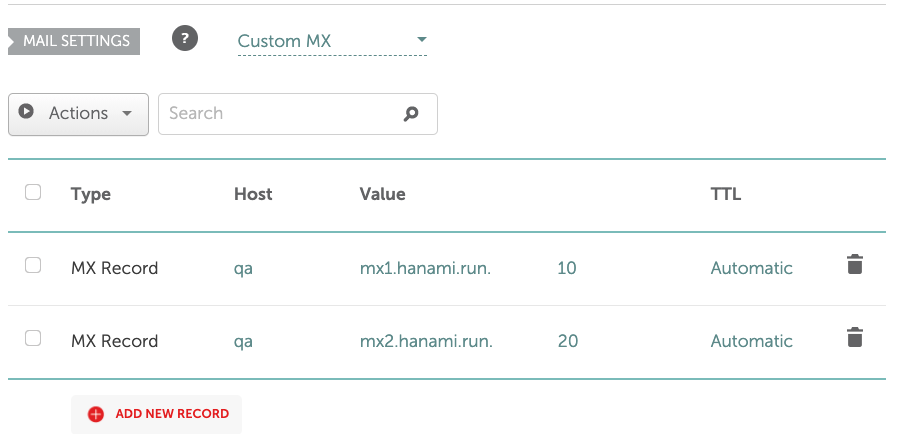
Let's walk through a use case where we want to forward email to domain qa.8moon.xyz so that anything@qa.8moon.xyz can be forwarded to your own
QA team email. You just need to follow the same steps to set MX and SPF records. However, where you leave the hostname empty or use `@` on your domain registrar, you will enter `qa` now. Take namecheap.com as an example, here is how the DNS looks like.
